wpHost2go.com WordPress
How to make an advanced install of WordPress in cPanel
This demo assumes you've already logged in to cPanel, and are starting on the home screen.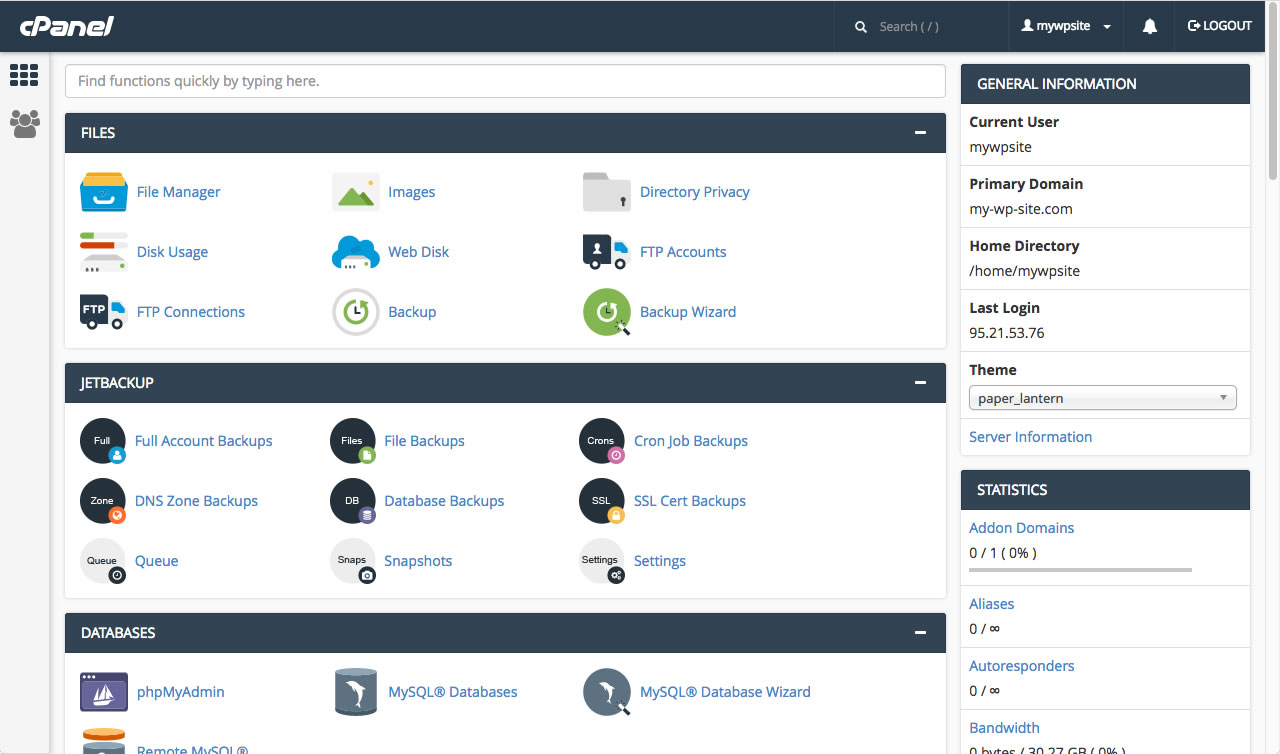
Now let's learn how to make an advanced install of Wordpress using the WordPress manager.
The advanced install method will allow you to choose a user name and password.
Scroll down and click the "WordPress Manager" icon.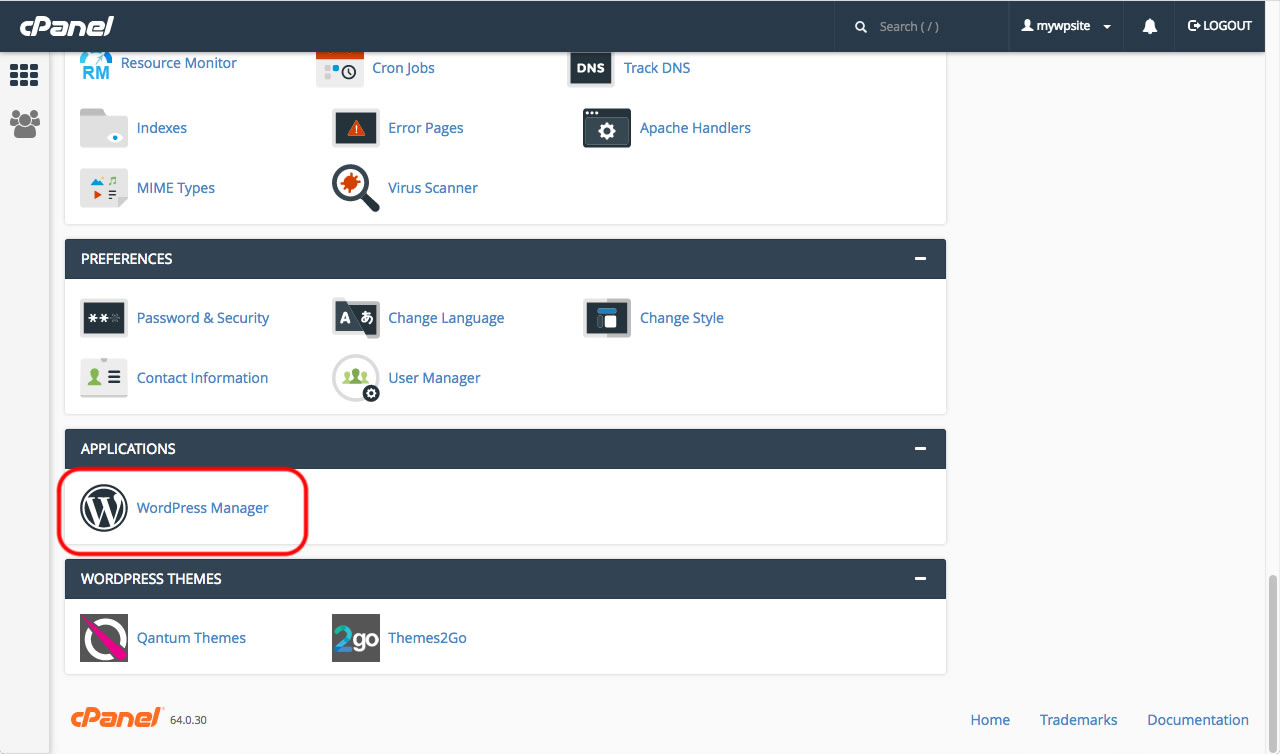
If there is currently no installation of WordPress then there will be a message to tell you that. To the right of that message, click on the link "Add an installation".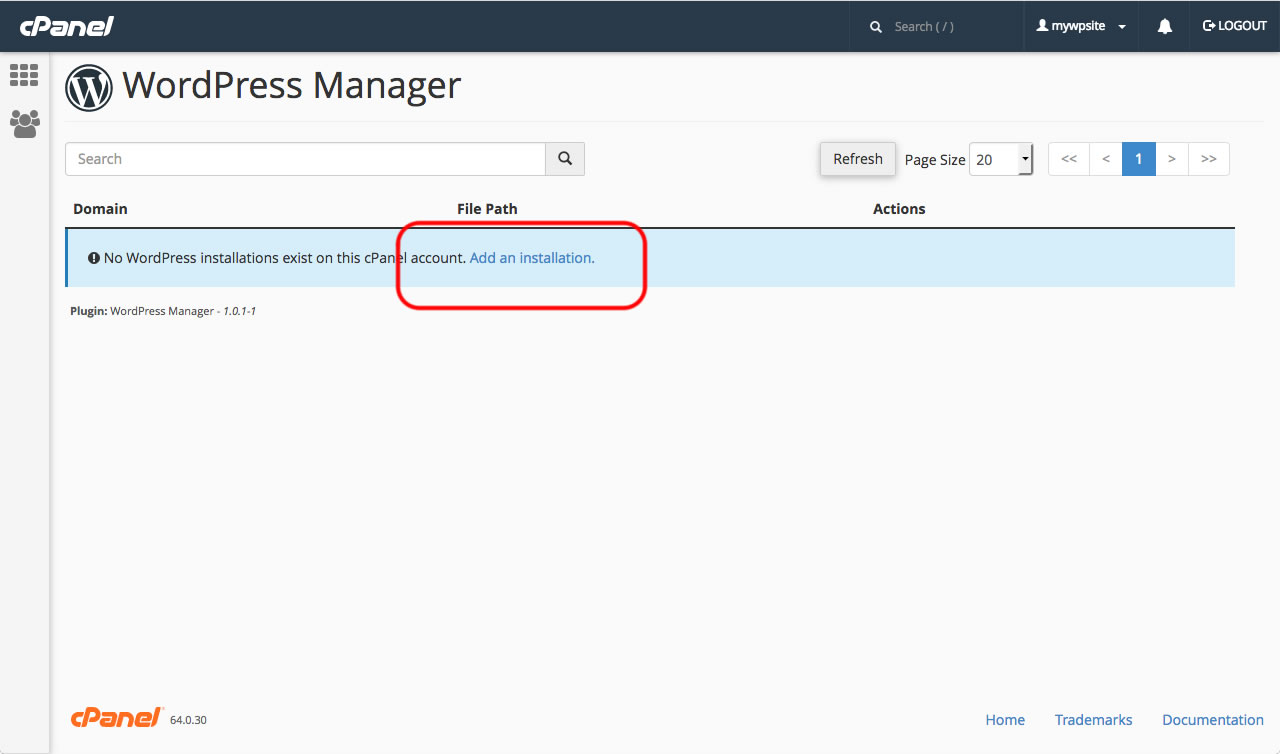
Click on "Show Advanced Configuration"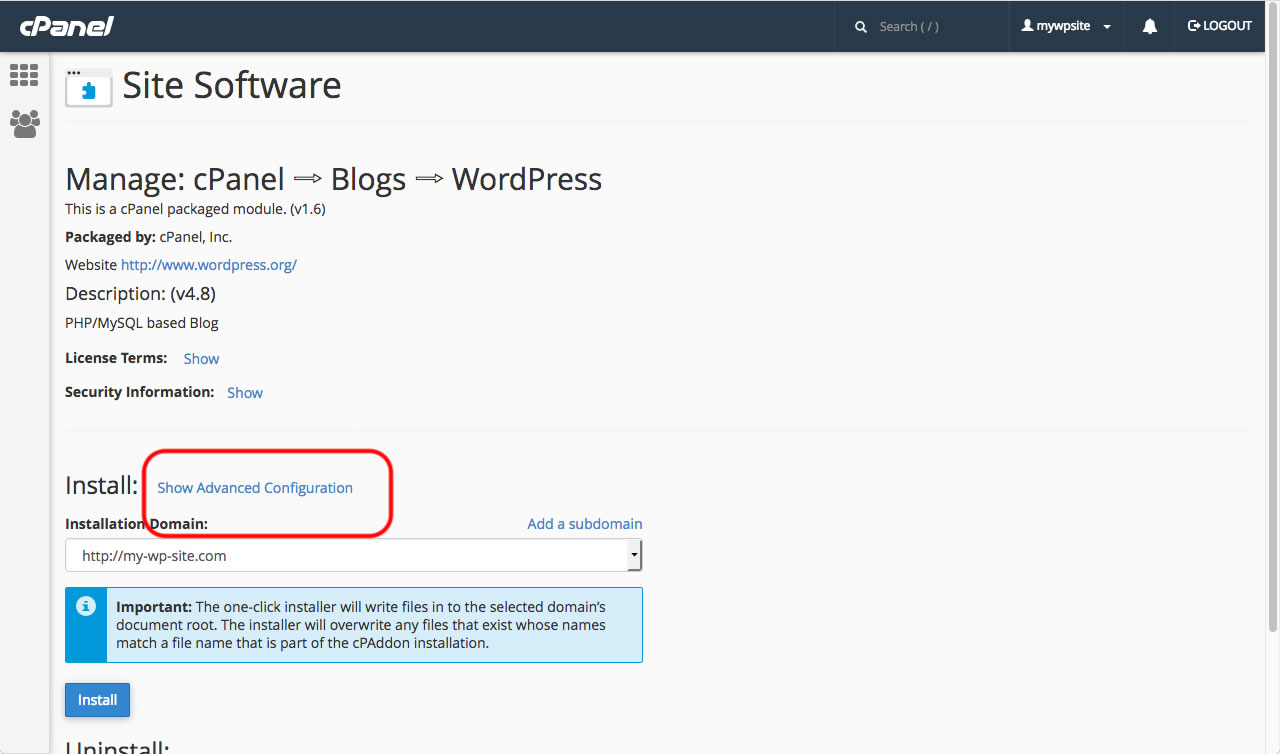
If you have more than one domain attached to this account, check that the correct domain is selected. Next look at the box to the right of the domain name selector. This is the path where Wordpress will be installed. 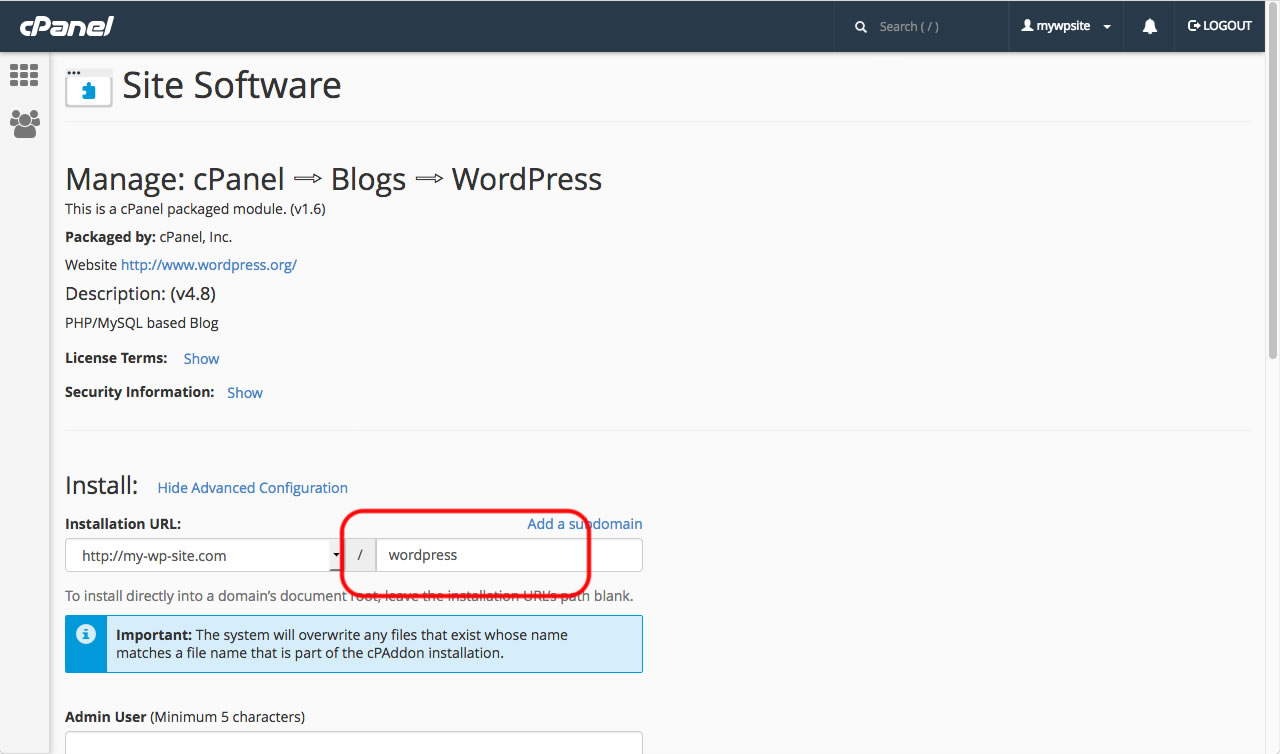
Normally, you will want to install WordPress into the root folder - so that the site will open with just the domain name being enterred by a user. Assuming that to be the case, delete the contents of the install folder box.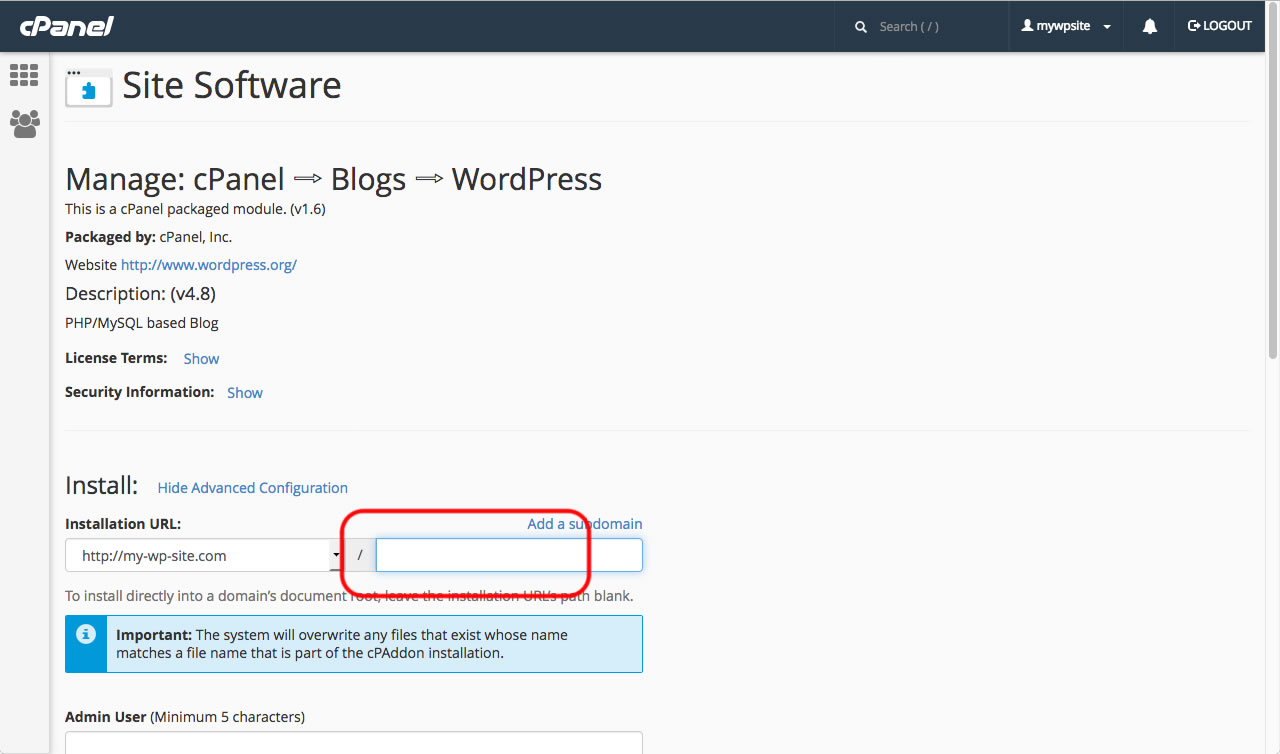
You can now enter your chosen Username (it is best NOT to use "Admin&Admin; as this is easily guessed by hackers), enter your choice of password or use the Passwrod Generator. You can also customise other details if you wish, but this is not necessary. When ready click "Install"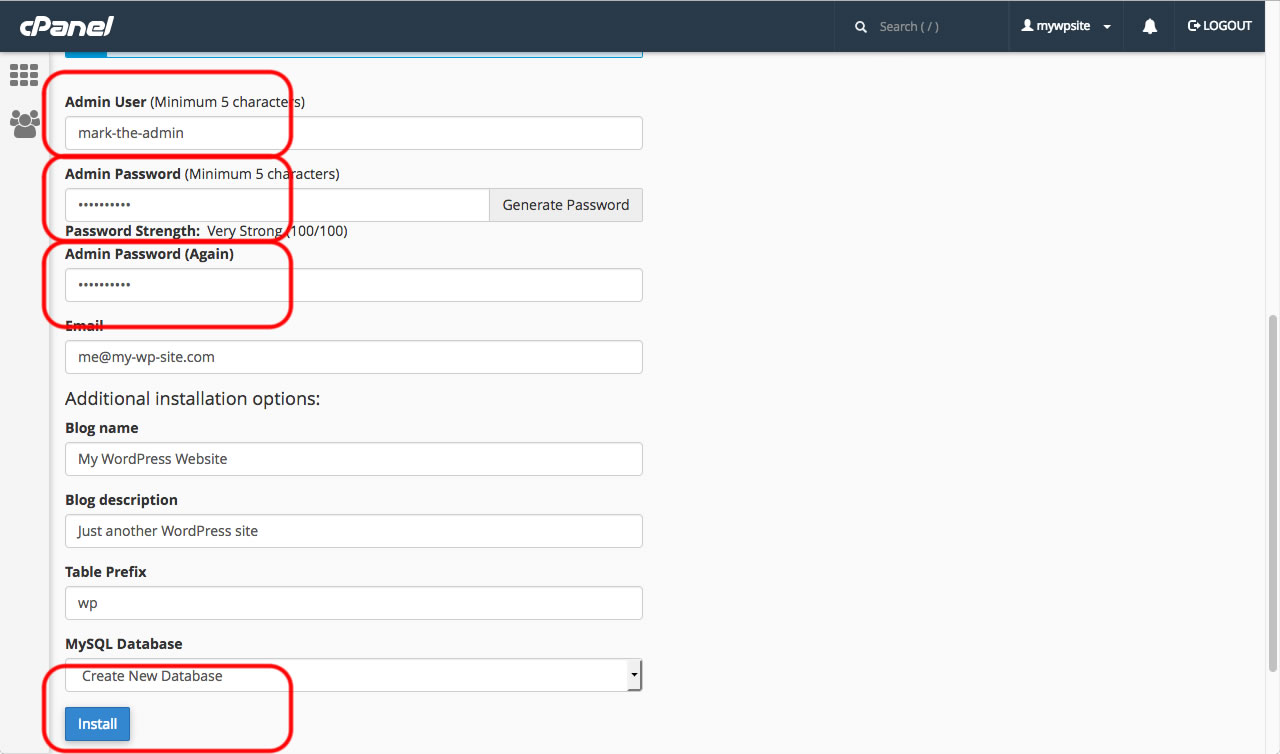
After the installation has finished, you will receive a confirmation message along with your login details.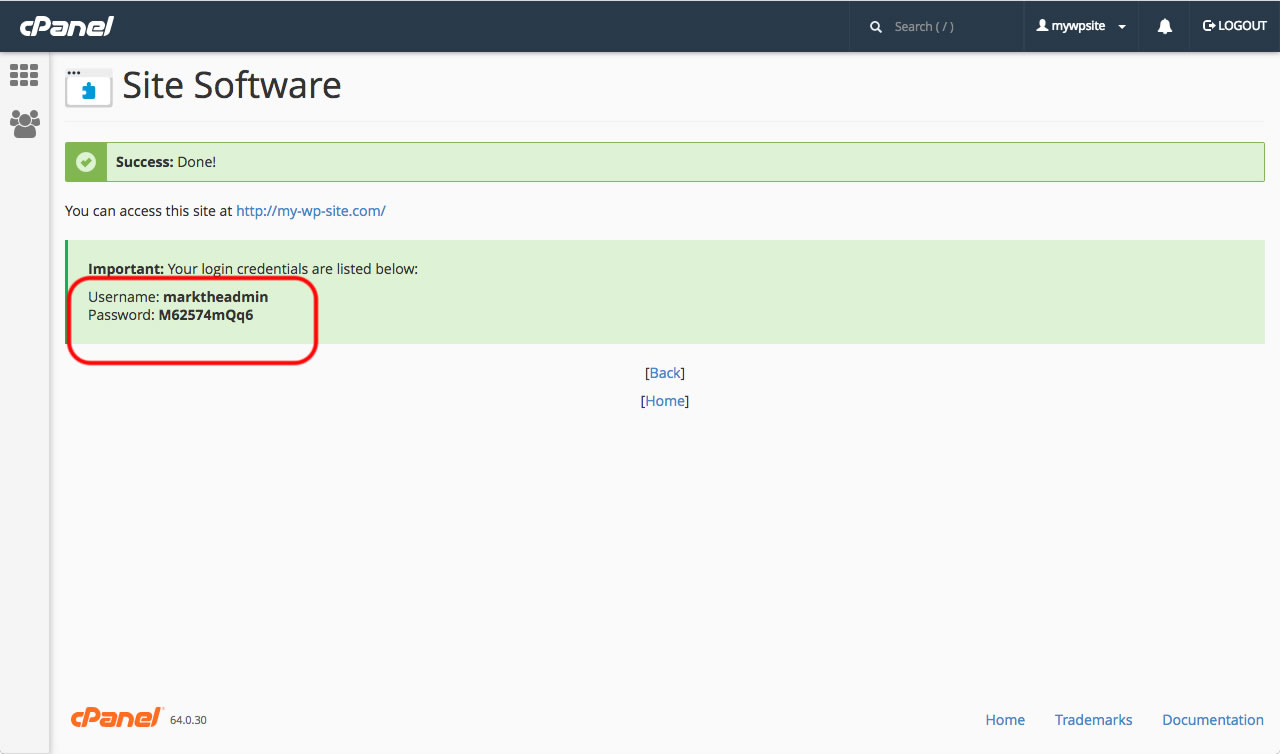
That's it! Your Wordpress website has now been installed. 
You can access the admin area of the website by adding "/wp-admin" to the end of your website address.
This is the end of the tutorial. You now know how to make an advanced install of WordPress.
