1. Using your domain name
The normal way is to type the URL of your domain into the address bar of a browser, followed by "/cpanel". You will need to know your cPanel user name and cPanel password (this is different to your username and password for the client area) to access the cPanel. See below to where to find this.
e.g. If your domain name is "mydomain.com" then use the URL: mydomain.com/cpanel
2. Using the IP address of the server
If your domain name is not yet resolving to the server, then you can use the IP address in place of your URL (again followed by "/cpanel"). You can find out how to get the IP address below.
3. Using your account control panel inside the client area of wpHost2go.com
Either log into your account in our client area of our website. The link that you received in your confirmation email when buying your hosting account will also take you there.
Once in your account, go to your services and loook for the Hosting service. Click on the name of the hosting service or on the "Active" button to the right hand side.
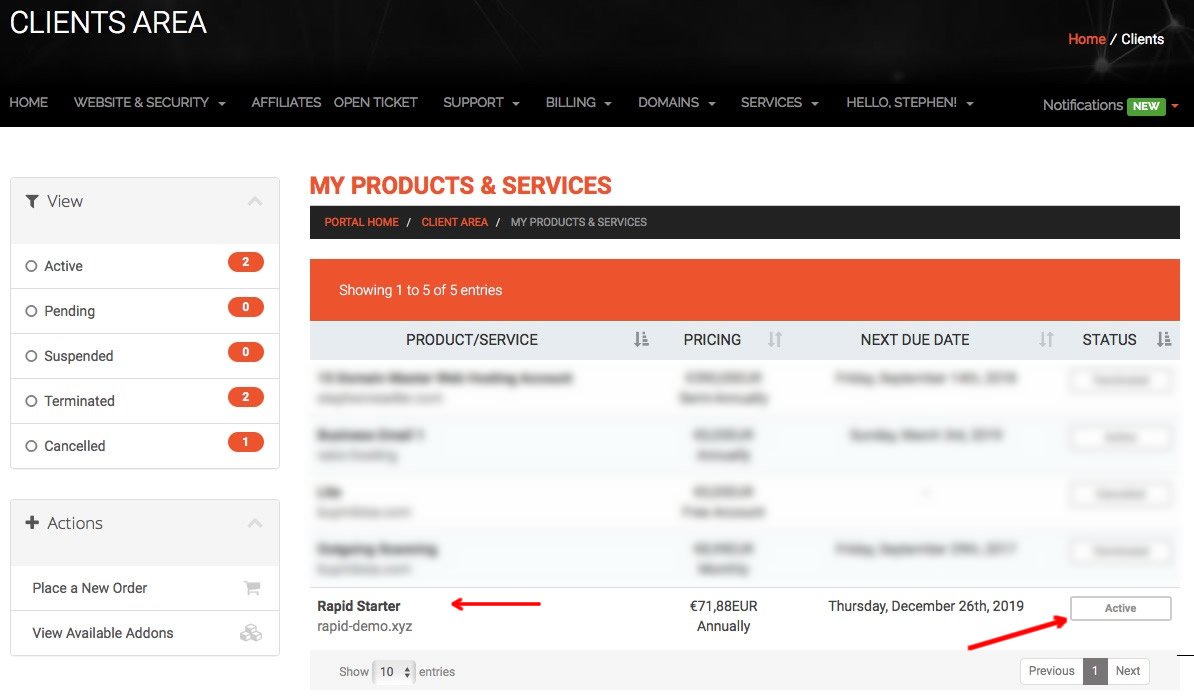
You will then see the product settings...
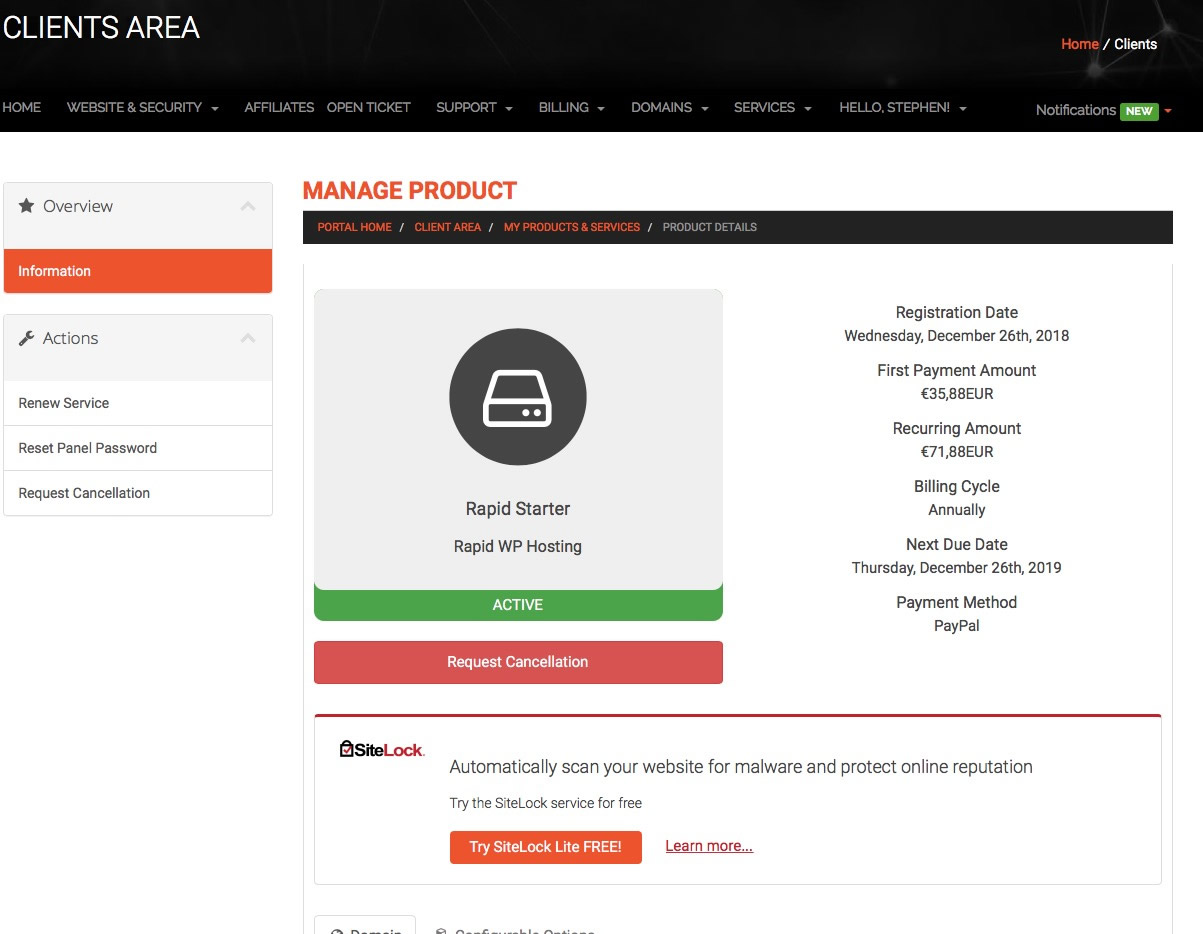
Scroll down
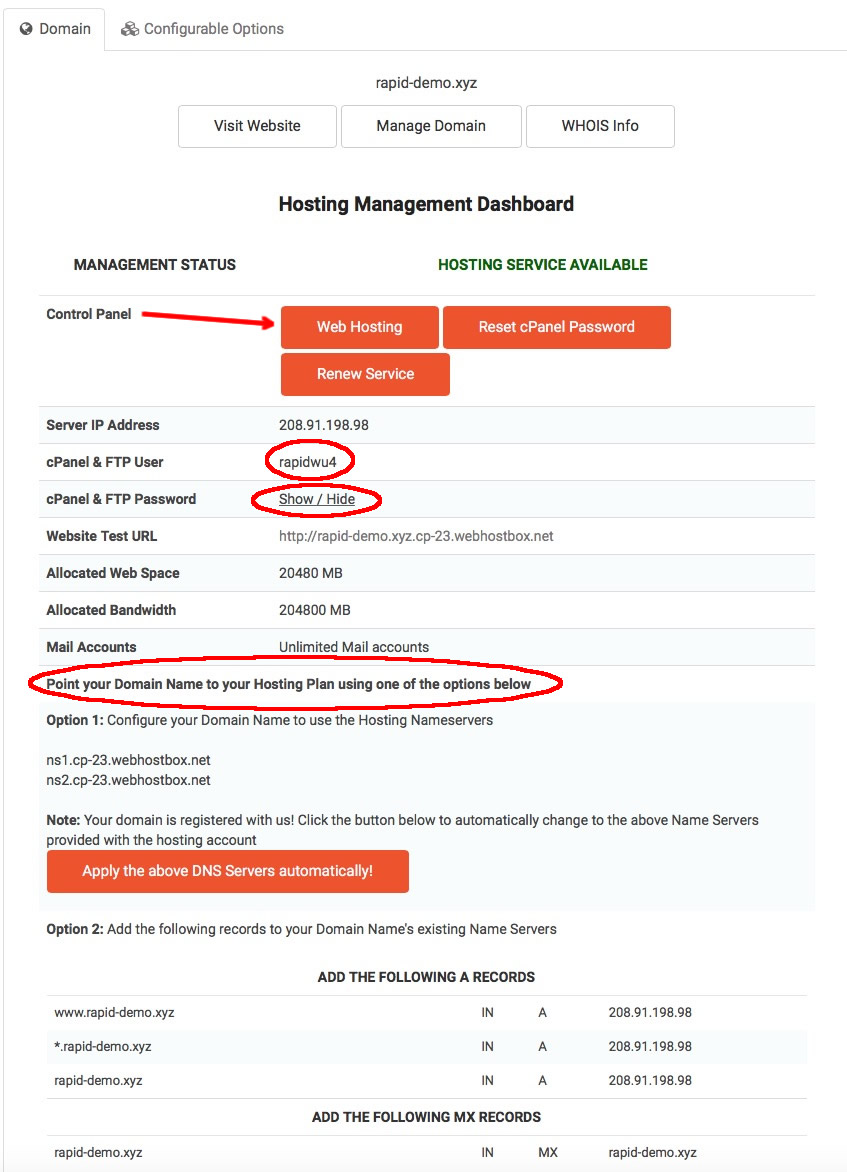
You will then see the details of the IP address of the server, your username for accessing the cPanel (and master FTP account), and your password. You will need to click on the "Show/Hide" link to display your password. (see image below)
Name Servers & DNS
So that your domain name will point to this hosting account, you either need to change your name server settings, or your DNS settings. The easiest was is to change your Name Server settings to the settings shown in Option 1 on your Hosting Management dashboard. If you have bought your domain from us, then you can press the big orange button to automaticall update and apply the correct name server settings to your domain.
If, however, your domain name is hosted else where (e.g. GoDaddy), then you will need to update the settings for your domain with that domain name registrar, see https://wphost2go.com/clients/index.php?rp=/knowledgebase/4/How-to-change-your-nameservers for additional help.
Alternatively, if you wish to leave your name servers set to where they currently are, then you can update the DNS records for those name servers as listed in Option 2 on your Hosting Mangement Dashboard.
Please make sure that you use the setting suppplied to you on your Hosting Mangement Dashboard and NOT the details shown in the image below, which is displayed only an as example.